{:en}16×2 I2C LiquidCrystal Display(LCD){:}{:ja}16×2 I2C LCD プロジェクト{:}
{:en}
This DIY project will tell you how to send a string like “Hello World!” to I2C 1602 LCD.
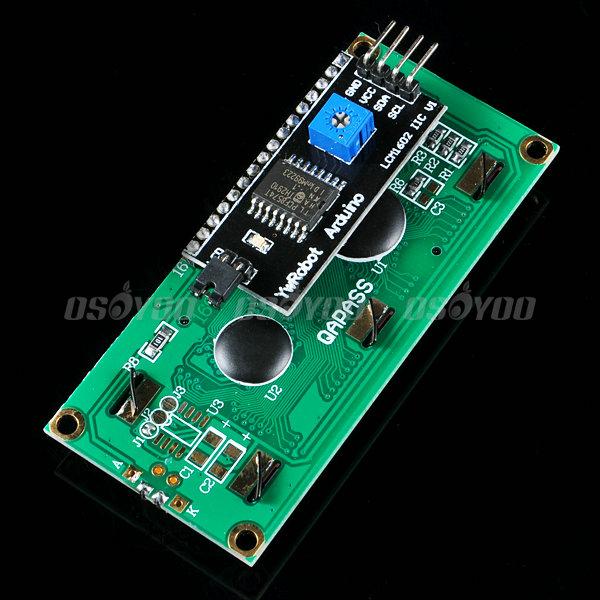
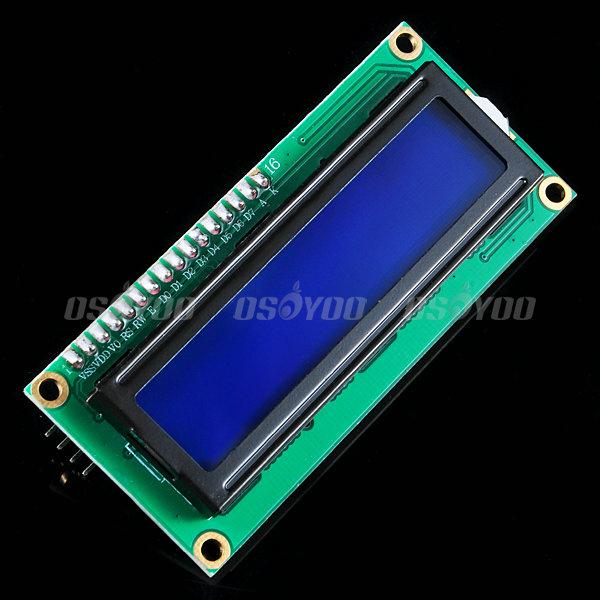
Kookye I2C 1602 LiquidCrystal Display is an improved version of the traditional alphanumeric LCD (16×2 characters) in original Arduino starter kit.
Kookye I2C 1602 LCD based on the 1602 panel with a small back-panel to convert it to I2C. The old style 1602 LCD needs 4 data lines + 2 control lines and totally occupies 6 digital ports. The new Kookye I2C LCD occupies only two analog ports and saves lots of Arduino port resources.
Setup instructions :
Step 1: Download LiquidCrystal_I2C.zip library file and Install I2C library:
This library REPLACES the standard one in Arduino V1.0. So
– in Arduino root fold->libraries rename the existing LiquidCrystal library directory
– unzip the LiquidCrystal_I2C.zip file
– place the folder LiquidCrystal_I2C into the libraries folder.
– in Arduino IDE click: Sketch->Import Library ->Add Library , then select above LiquidCrystal_I2C fold and open.
the import library list should show a new item “LiquidCrystal_I2C”
– Start up the Arduino IDE
Step 2 – Connect LCD with Arduino

If your Arduino is an Uno, the I2C connections are on SDA=A4 and SCL=A5. So go ahead and wire these up, along with the two power leads to the 5V and GND terminals.
Step 3 – Power up your devices.
You should see the LCD light up. Depending on how the device was constructed, you might want to turn down the contrast of the LCD; you can do this by inserting a screwdriver into the potentiometer at the back. I suggest you turn it half-way so that there’s still a little contrast.
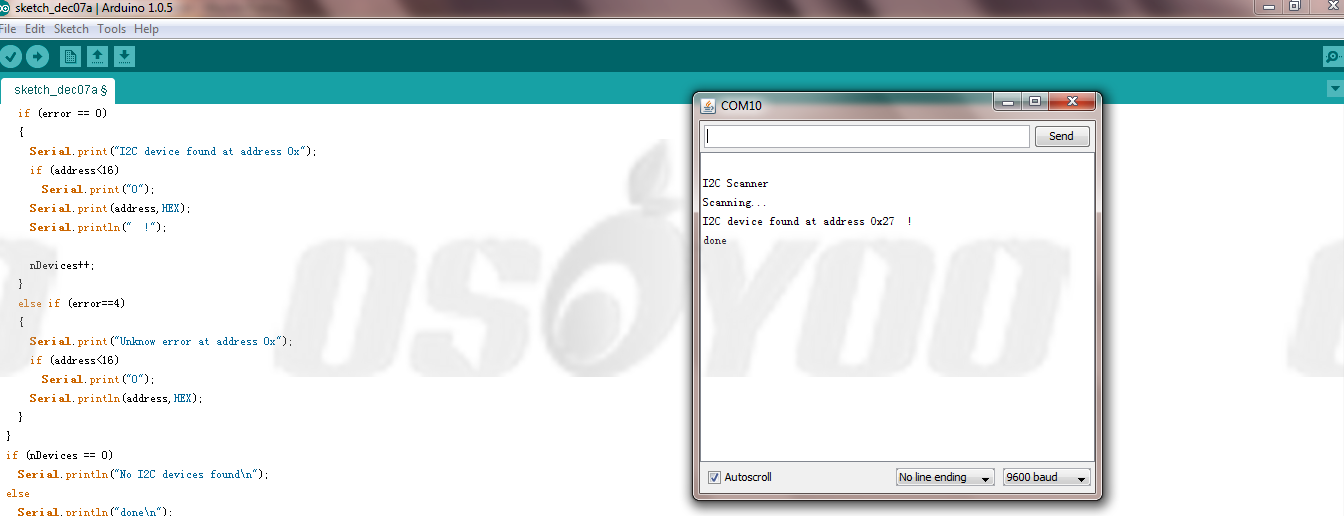
Step 4 – find the I2C address
Each device has an I2C address that it uses to accept commands or send messages. For Uno board, this address usually is 0x27. But sometimes the address might be changed 0x37,0x24 …., So let’s go and look for the one on your device.
Download ic2_scanner sketch file and load it into Arduino IDE. By opening up the serial monitor in the upright corner, Arduino will scan the address range looking for a reply. Most Arduino board will show 0x27, however it be other number.

Write down the Address that you have found, you’ll need it in the next step.
Step 5 – Fire up the LCD
Download ic2_lcd_test sketch file and set the I2C address to match ic2_scanner output value, load it into Arduino IDE.
You should see following message in LCD:
Hello World!
Soonics.com/blog
Done!
Related Article Recommend: The Instruction on LiquidCrystal I2C Doesn’t Work With Hello World Example
{:}{:ja}I2C 1602 LCDで”Hello World!” などの文字列を表示のプロジェクトです。
Osoyoo I2C 1602液晶ディスプレイは従来Arduinoオリジナルスターターキットの英数字LCD(16×2)の改良版です。
Osoyoo I2C 1602 LCDは1602パネルに基づいて、パネルの裏に小さいI2C変換器が付いています。古いタイプの1602 LCDは4つデータワイヤ+2の制御ワイヤが必要し、すべて6つの
デジタルポートを占有します。
弊社のOsoyoo I2C LCD は唯2つのアナログポートを使用しますので、とても便利と思います。
操作の手順
Step 1: LiquidCrystal_I2C.zipというlibraryファイルをダウンロードして、 I2C libraryをインストールしてくださいませ。
このlibraryファイルを使って、古いのLiquidCrystalを取り替えて下さい。
– Arduino IDEの根フォルダにlibrariesというフォルダがあります、このフォルダを開いて、既に有るのLiquidCrystal_I2Cというフォルダの名前を変更してくださいませ。
– ダウンロードしたのLiquidCrystal_I2C.zipファイルを解凍して下さい。
– 解凍済みのLiquidCrystal_I2Cフォルダをlibrariesフォルダに置いてくださいませ。
– Arduino IDEの操作画面で「Sketch->Import Library ->Add Library」をクリックして、解凍済みのLiquidCrystal_I2Cフォルダを選択して、開いてくださいませ。リストで新しいLiquidCrystal_I2Cを見えるになります。
-Arduino IDEを起動してくださいませ。
Step 2 – LCDとArduino ボードを接続してくださいませ。画像をご覧ください~(画像をクリックして拡大イメージを表示)
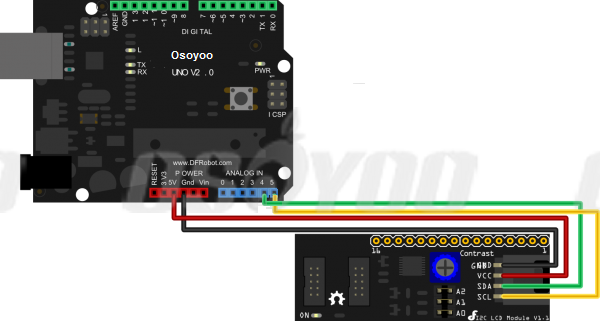
Arduino Unoボードを使用の場合、 I2Cとの接続は、「SDA=A4 」「SCL=A5」「VCC=5V」 「GND=GND」のように接続してくださいませ。
Step 3 – 通電しましょう~
通電したら、LCDがライトアップすると思います。使用環境により、 LCDコントラストの調整も必要だと思います。LCDの裏につまみがありますので、マイナスドライバーを使って、調整してくださいませ。明らかに判断できるため、できるだけ、使用の途中で調整してくださいませ。
Step 4 – LCD I2Cのアドレスを探す
常識ですが、デバイスはコマンドの受信やメッセージを送信のため、I2C アドレスがありますね。 Arduino Uno ボード の場合、普段は0x27というアドレスがありますが、 0x37,0x24 ….,などに変更した事もあります。そのため、I2C アドレス探しましょう~
ic2_scannerというファイルをダウンロードして、 Arduino IDEにロードしてくださいませ。Arduino IDEの操作画面で「Tools」-「serial monitor」を開いて、I2Cアドレスを表示できると思います。
普段は0x27ですが、異なるの場合も御座います。
次のstepに必要ですので、表示されるアドレスを記録してくださいませ。
Step 5 – コマンドをLCDに焼きで下さい
ic2_lcd_testというファイルをダウンロードして、 ファイルでのI2C addressを記録したの数値を変更して、 Arduino IDEにロードしてくださいませ。
ロード完了したら、LCDで下記のメッセージを表示できると思います。
Hello World!
Soonics.com/blog
上記の手順をはっきり操作しても、表示しないの場合、LCDの裏のつまみをマイナスドライバーで使って、調整して見てくださいませ。
終わり!{:}
admin administrator
You must be logged in to post a comment
About the Author