{:en}Flashing LEDs{:}{:ja}LED点滅 プロジェクト{:}
{:en}
This DIY project will tell you how to use Arduino to control LEDs and make them flashing.
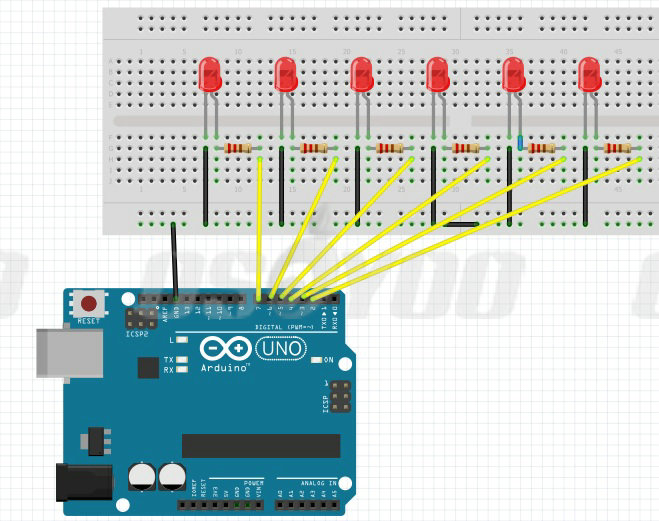
The long leg of an LED is the positive leg, also called the anode. It should connect a digit Pin through 220 ohm resistor. The short leg is the negative leg, also called the cathode, must connect to ground.
Connection Graph:

Download the loop.ino sketch file, then load it into Arduino.
The six LEDs in the circuit will light in sequence, then in reverse.
{:}{:ja}
Arduinoを使って、LEDを制御し、LEDを点滅するのプロジェクトです。
LEDの長い足は、アノードと呼ばれ、正極です。LEDの正極は200オームの抵抗通じで、Arduino ボードのディジット pinと接続してください。LEDの短い足はカソードと呼ばれ、負極です。LEDの負極はArduino ボードのグランド インタフェースと接続してくださいませ。
配線図(画像をクリックして拡大イメージを表示):
ダウンロード loop.ino sketch ファイル, ダウンロード後、このファイルをArduinoにロードしてくださいませ。.
ロード完了したら、6個のLEDはまず左から右まで次々に点灯、その後、逆の方に次々に点灯します。
{:}
admin administrator
You must be logged in to post a comment
About the Author