Installation guide for ESPduino board for Arduino Uno R3
This section is just for the installation and use the Arduino IDE, and download the code into the ESPduino development board. Especially, for convenience, we have already improved the ESPduino since Sep. 30, 2016, and now you DO NOT need to press any button, when you download the code. Note that, the old version must press the button when download the code.
ESPduino IDE Installation
1. Download the Arduino IDE : http://en.doit.am/espduino.php or https://github.com/esp8266/Arduino#installing-with-boards-manager
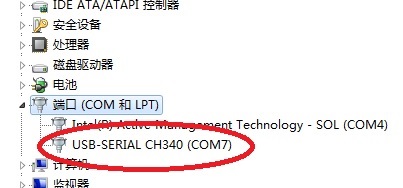
2. Install the CH340 chip driver, and Choose the port by the computer
Widowns & MAC :http://bbs.smartarduino.com/showthread.php?tid=2038
Ubuntu:https://github.com/esp8266/Arduino%20for%20Ubuntu
3.After installation of Arduino and CH340 driver. Open the Arduino IDE, and choose the development board type ” ESPDuino (ESP-13 module) “, as shown in the following Figure.

Then, you will see the setting information.
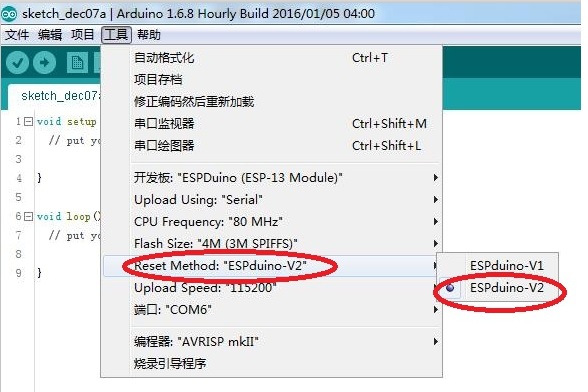
Note that, if you get the new version ESPduino (order it after Sep. 30, 2016), please further confirm whether the “Reset Method” is “ESPduino-V2” (which is also the default setting); if you get the old version (order it before Sep. 30, 2016), please choose the “Reset Method” is “ESPduino-V1”.
4.Test the Arduino IDE
After building the Arduino IDE, we should test whether the Arduino IDE for ESPduino board is normal by a example, the Blink, which is provided by the standard Arduino IDE, as shown in the following Figure.
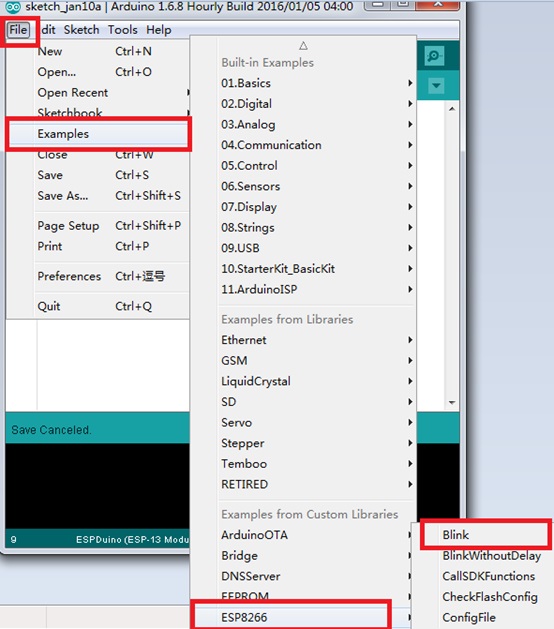
If it is successful, then the Arduino IDE for ESPduino IDE is ok.
Note that, the newest updated information, also can visit the following github link:
https://github.com/SmartArduino/SZDOITWiKi/wiki/Arduino—ESPduino
amber administrator
You must be logged in to post a comment
About the Author