{:en}Design a body motion detector through raspberry pi with PIR motion sensor and buzzer sensor{:}{:ja}ラズパイとモーションセンサー、ブザーを使って、簡易セキュリティー・アラームを作る{:}{:zh}基于Raspberry Pi的简易安防系统{:}
{:en}
Overview
This project introduces how to design a body motion detective security system with raspberry pi. The Experimental principle of this project is that, when the detection of the body motion, Raspberry Pi GPIO output get high level voltage and buzzer sound.
Experimental photo
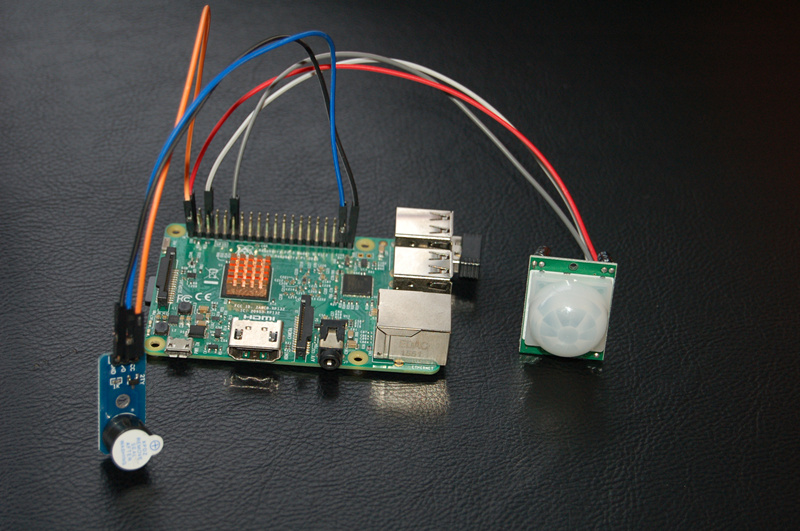
Experimental Parts
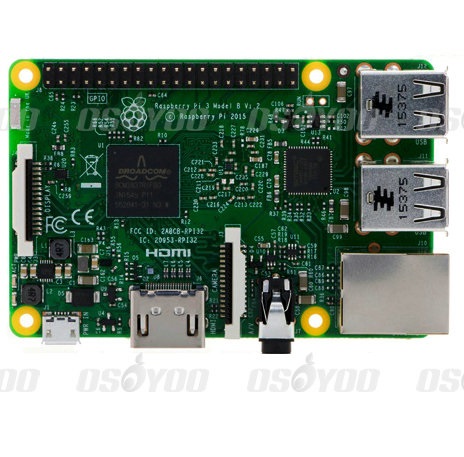 |
Raspberry Pi3 x1
|
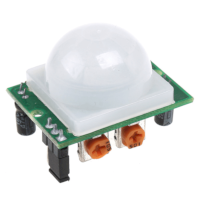 |
Motion Sensor x1
|
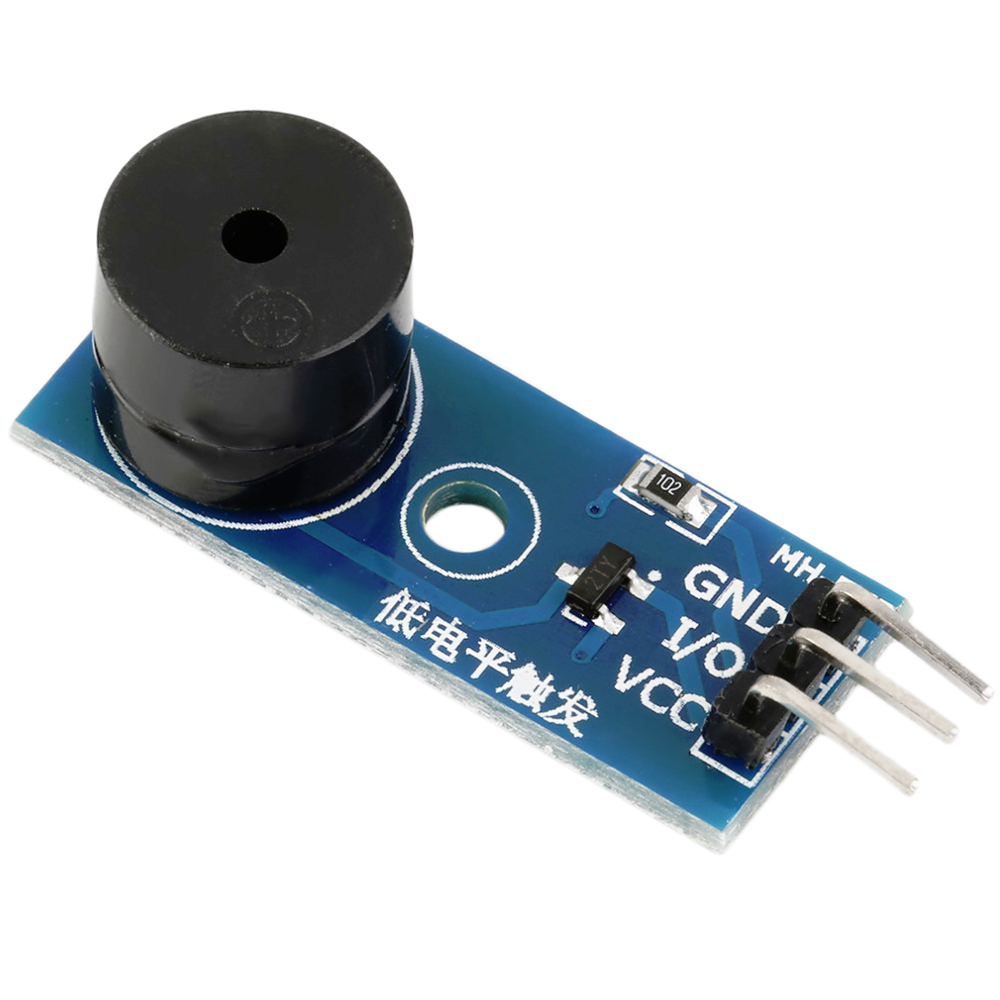 |
Buzzer sensor x1
|
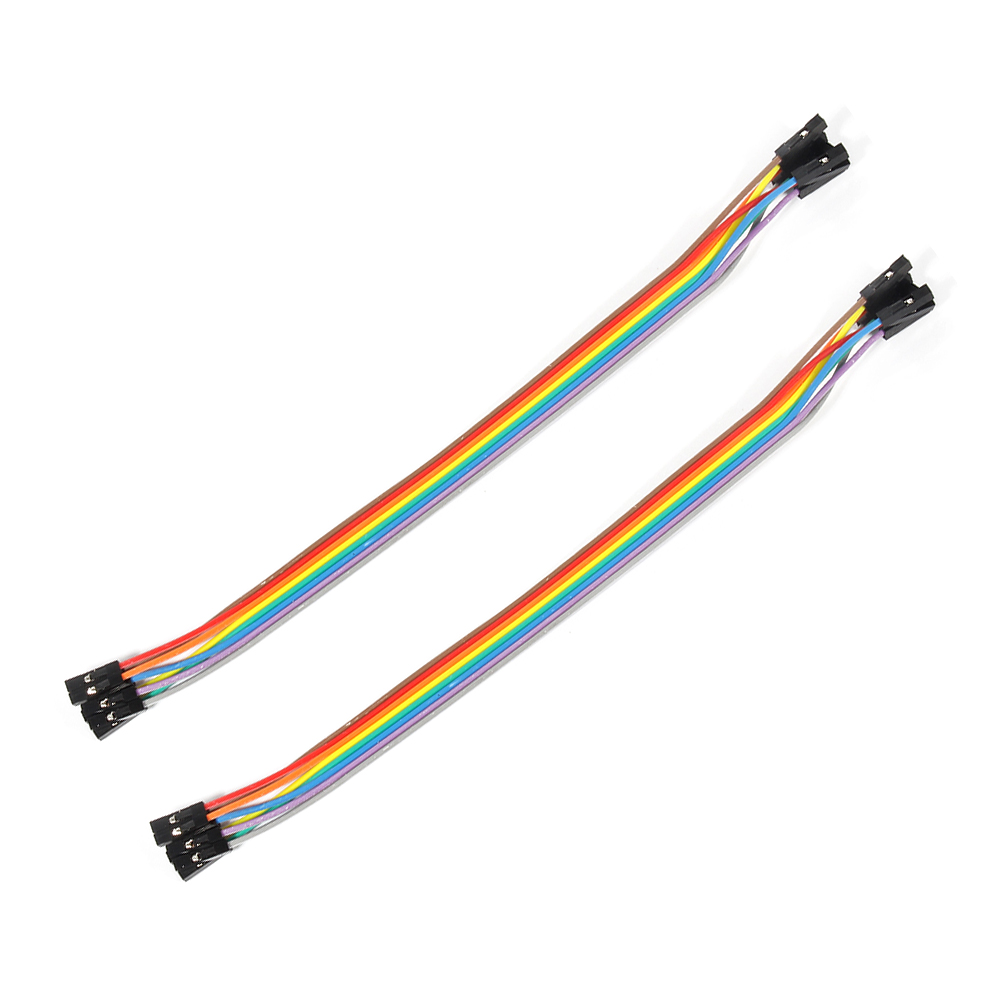 |
Jumper wires
|
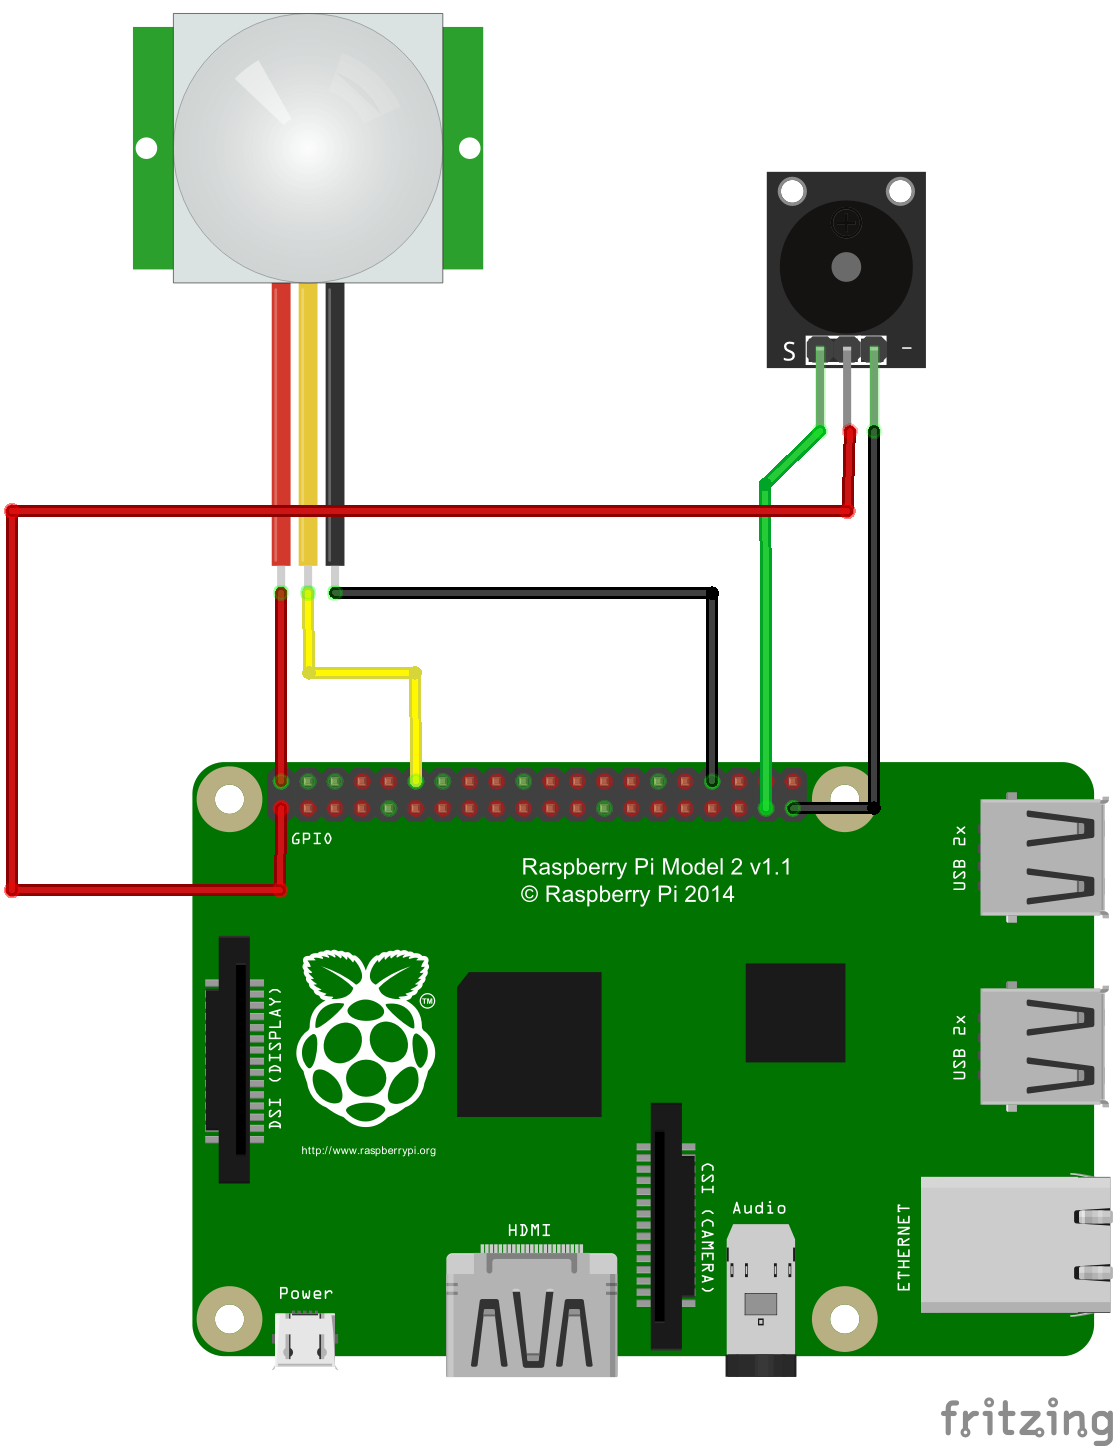
Circuit Graph
Note: Please note that reversing +/- or incorrectly connecting can destroy your raspberry Pi. The buzzer you get may have different solder pin as the following graph, please prevail in kind.
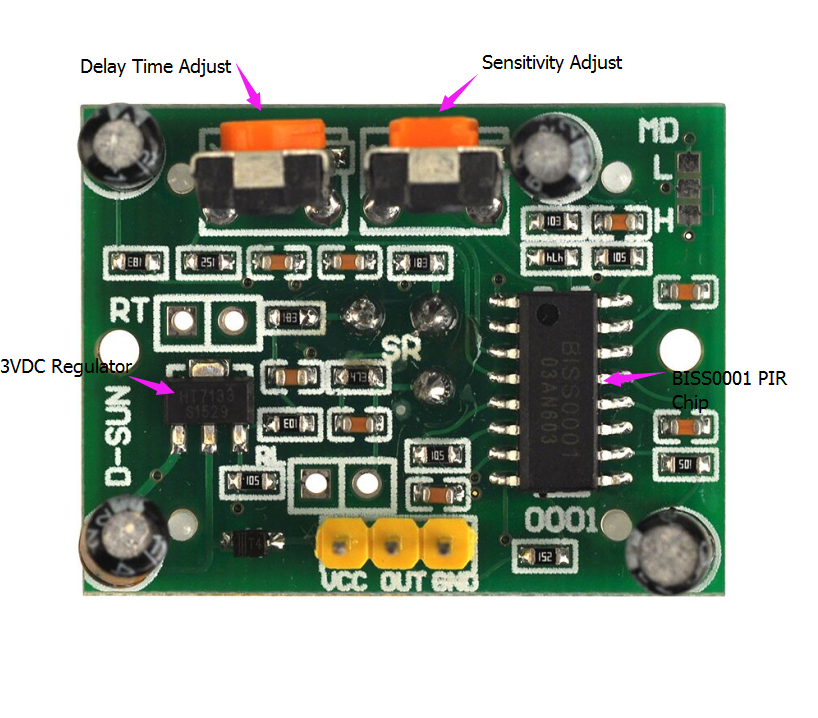
Motion Sensor Schematic

Motion sensor Interface Layout
The two potentiometer can adjust delay time and sensitivity, as the follow picture:
Software
1) Enter the following command to compile the code, and press “enter” to complete compiling code:
sudo wget --no-check-certificate http://osoyoo.com/driver/motionsensor-test.py
You could modify the code throught the following ways.
enter the following command to create a new file named motionsensor-test.py and save this file at direction: /home/pi, and then press enter
sudo nano motionsensor-test.py
the downloaded code are actually as following:
import RPi.GPIO as GPIO
import time

M_pin = 18 #select the pin for motionsensor
B_pin = 26 #select the pin for buzzer

def init():
         GPIO.setwarnings(False)
         GPIO.setmode(GPIO.BCM)
         GPIO.setup(M_pin,GPIO.IN)
         GPIO.setup(B_pin,GPIO.OUT)
         pass

def buzzer():
         while GPIO.input(M_pin):
                  GPIO.output(B_pin,GPIO.LOW)
                  time.sleep(0.5)
                  GPIO.output(B_pin,GPIO.HIGH)
                  time.sleep(0.5)

def detect():
         for i in range(101):
                  if GPIO.input(M_pin):
                           print "Someone is closing!"
                           buzzer()
                  else:
                           GPIO.output(B_pin,GPIO.HIGH)
                           print "Nobody!"
                  time.sleep(2)

time.sleep(5)
init()
detect()

GPIO.cleanup()
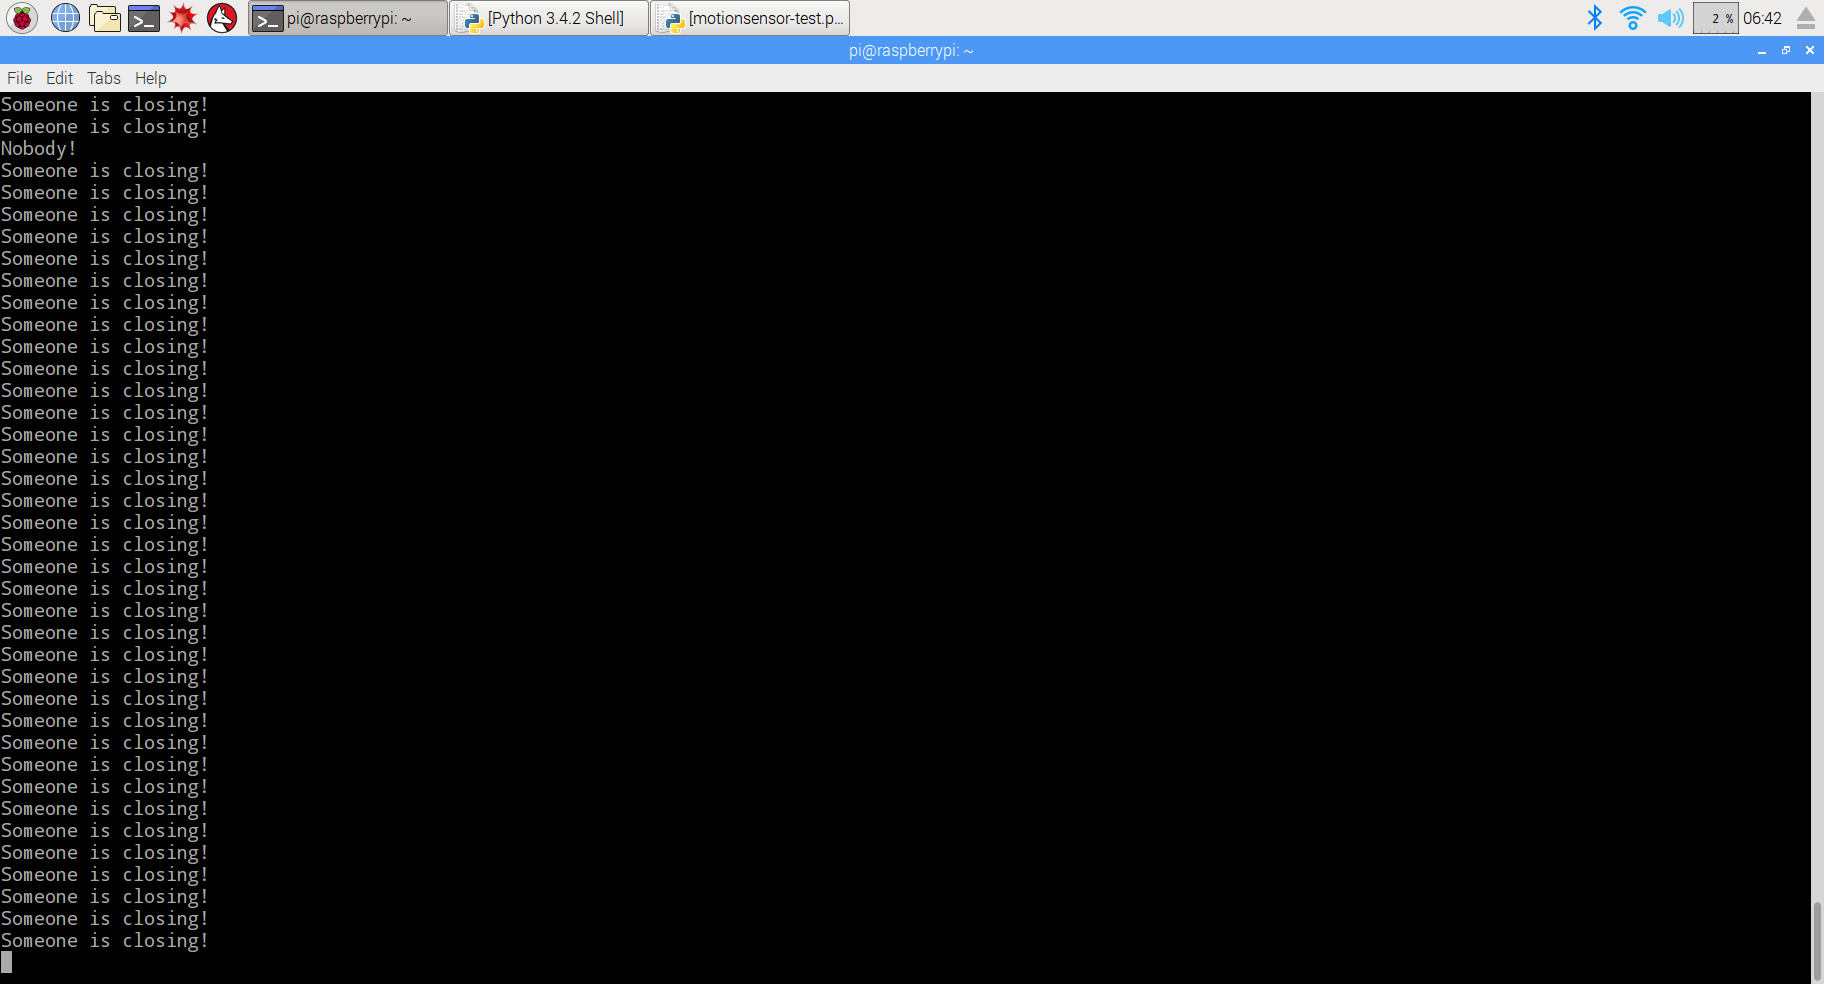
Experiment Result:
Enter the following command to run python program, and press “enter” to run the project. When detection body motion, you will hear buzzer sound, and the monitor shows as the photo:
sudo python ./motionsensor-test.py
 {:}{:ja}説明
ラズパイとモーションセンサー、ブザーを使って、簡易セキュリティー・アラームを作ります。ラズパイは固定期間にモーションセンサーからの高、低電位信号を検査して、人が近づいてくるとブザーが鳴ります。
必要なパーツ
|
|
Pi3ボード x1
|
|
|
モーションセンサー x1
|
|
|
5V ブザー x1
|
|
|
ジャンプワイヤー x若干
|
配線図
線路が違うとボード、センサーに損害の恐れが御座いますので、正極と負極を十分ご注意して下さい。Raspberry PiのGPIOピンの概要はこちら~ブザーのPIN番号が異なる可能性も御座いますので、実物を対照して、配線してくださいませ。ブザーが低電位信号で作動します。
モーションセンサー回路図
モーションセンサー インタフェースのレイアウト
2つのつまみが遅延時間と感度の調整ができます:
ソフトウエア
1)nanoエディターを使って、下記のコマンドを作動して、/home/piにmotionsensor-test.pyファイルを新規作成します。
sudo nano motionsensor-test.py
2)motionsensor-test.pyに下記の内容をコーピーして下さい:
import RPi.GPIO as GPIO
import time

M_pin = 18 #select the pin for motionsensor
B_pin = 26 #select the pin for buzzer

def init():
         GPIO.setwarnings(False)
         GPIO.setmode(GPIO.BCM)
         GPIO.setup(M_pin,GPIO.IN)
         GPIO.setup(B_pin,GPIO.OUT)
         pass

def buzzer():
         while GPIO.input(M_pin):
                  GPIO.output(B_pin,GPIO.LOW)
                  time.sleep(0.5)
                  GPIO.output(B_pin,GPIO.HIGH)
                  time.sleep(0.5)

def detct():
         for i in range(101):
                  if GPIO.input(M_pin):
                           print "Someone is closing!"
                           buzzer()
                  else:
                           GPIO.output(B_pin,GPIO.HIGH)
                           print "Nobody!"
                  time.sleep(2)

time.sleep(5)
init()
detct()

GPIO.cleanup()
或いは、下記のコマンドを作動して、弊社編集済みのmq-5.pyを直接にダウンロードできます。
sudo sudo wget --no-check-certificate http://osoyoo.com/driver/motionsensor-test.py
3)プログラムを作動する
sudo python ./motionsensor-test.py
人が近づいてくると、ターミナルに「Someone is closing!」と表示し、ブザーがなります。
{:}{:zh}Overview
本文主要介绍如何用树莓派实现简易防人体入侵安防系统,树莓派周期性检测人体红外检测模块输出的高低电平,当有人入侵时候蜂鸣器报警.
Experimental Parts
|
|
Pi3 x1
|
|
|
人体红外感性模块 x1
|
|
|
有源蜂鸣器 x1
|
|
|
杜邦线 x3
|
Circuit Graph
硬件连线很简单,如图。
在连接电路的时候特别注意不要把电源正负极接反,否则会烧毁Pi和传感器模块,上图中蜂鸣器模块引脚顺序可能跟实物引脚顺序不一样,在接线的时候需要对照实物连线。
其中蜂鸣器是低电平有效的。
下面给出人体红外检测模块、继电器模块的原理图。
Motion sensor Schematic
Motion sensor Interface Layout
The two potentiometer can adjust delay time and sensitivity, as the follow picture:
Software
1)在/home/pi路径下用nano新建一个motionsensor-test.py文件
sudo nano motionsensor-test.py
2)向motionsensor-test.py中写入代码
import RPi.GPIO as GPIO
import time

M_pin = 18 #select the pin for motionsensor
B_pin = 26 #select the pin for buzzer

def init():
         GPIO.setwarnings(False)
         GPIO.setmode(GPIO.BCM)
         GPIO.setup(M_pin,GPIO.IN)
         GPIO.setup(B_pin,GPIO.OUT)
         pass

def buzzer():
         while GPIO.input(M_pin):
                  GPIO.output(B_pin,GPIO.LOW)
                  time.sleep(0.5)
                  GPIO.output(B_pin,GPIO.HIGH)
                  time.sleep(0.5)

def detct():
         for i in range(101):
                  if GPIO.input(M_pin):
                           print "Someone is closing!"
                           buzzer()
                  else:
                           GPIO.output(B_pin,GPIO.HIGH)
                           print "Nobody!"
                  time.sleep(2)

time.sleep(5)
init()
detct()

GPIO.cleanup()
写完代码后,键盘输入Ctrl X根据提示输入Y保存退出
示例代码可以通过下面命令下载得到
sudo wget --no-check-certificate http://osoyoo.com/driver/motionsensor-test.py
3)运行脚本
sudo python ./motionsensor-test.py
屏幕上打印出了提示信息,检测到人体移动的时候,蜂鸣器响起。
{:}
amber administrator
About the Author