 Byamber
Arduino UNO + Arduino CNC Shield V3.0+A4988 Installation Guide
Overview
This CNC shield is designed to allow you to control a CNC router/milling machine from an Arduino board. It contains 4 driver sockets which allows compatible Pololu A4988/DRV8825 driver modules to be inserted providing the ability to drive 3 stepper motor axis (X,Y, & Z).With this shield and the Arduino you can build many kinds of CNC projects
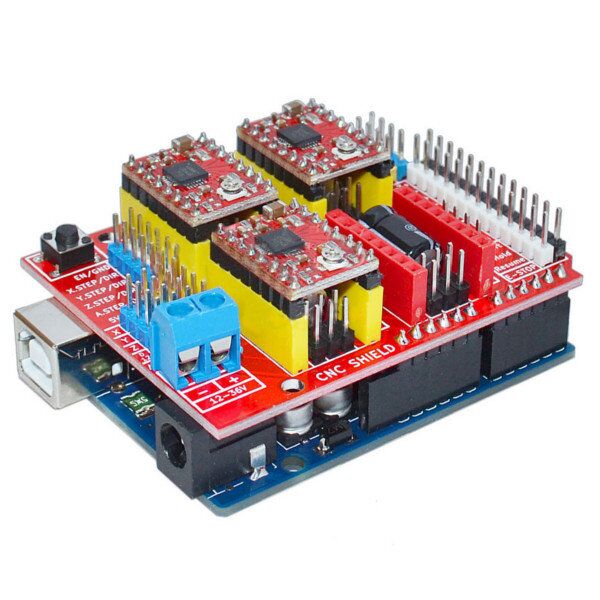
Board Layout
The following image displays the functionality of the Arduino pins as used by GRBL.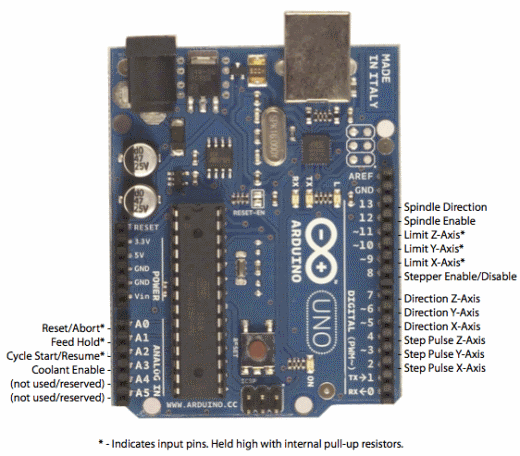
GRBL Pin Layout
Except all the pins for GBRL, Arduino CNC Shield V3.0 contains addition pins allows more functions:
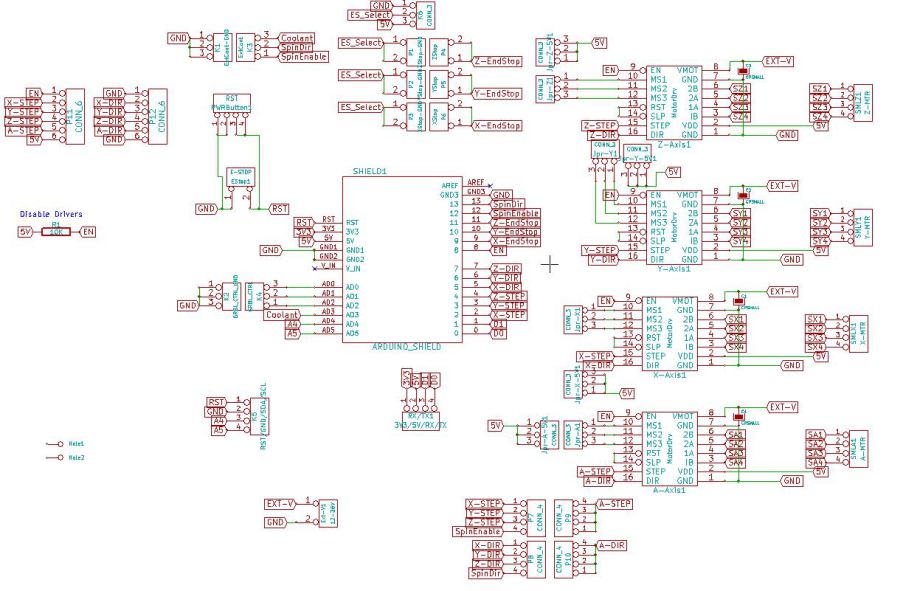
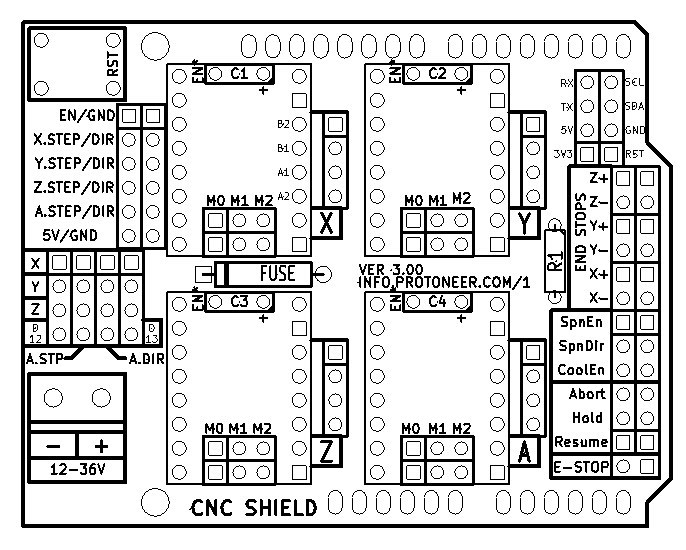
Extra pins:
- Limit switch pins have been doubled up so that each axis has a “Top/+” and “Bottom/-“. This makes it easier to install two limit switches for each axis. (For use with a normally open switch)
- EStop – These pins can be connected to an emergency stop switch. This does the same as the RESET button on the Arduino board. (We do advice that an extra emergency button also be installed that cuts power to all machinery. A REAL EMERGENCY BUTTON)
- Spindle and coolant control has their own pins.
- External GRBL Command Pins have been broken out allowing you to add buttons for Pause/Hold , Resume and Abort.
- Serial Pins (D0-1) and I2C Pins (A4-5) have their own break out pins for future extensions. I2C can later be implemented by software to control things like spindle speed or heat control.
- Version 3.00 of the board added a jumpers to configure the 4th axis(Clone the other axis’s or run from Pin D12-13), Comms Header(RX+TX , I2C) and a Stepper Control Header(All Pins needed to run 4 steppers)
Hardware installation
WARNING:
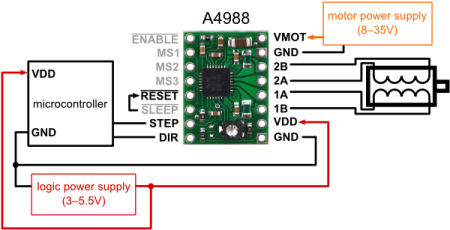
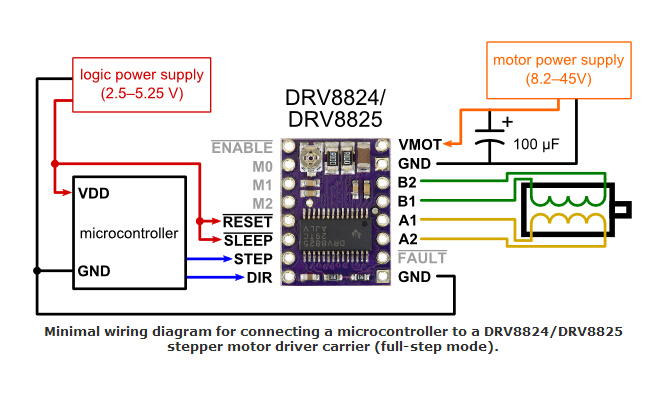
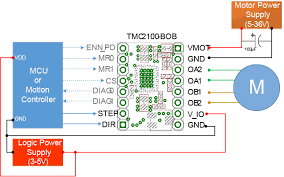
1)Reversing +/- or incorrectly connecting power will destroy your electronics and cause fire hazard
2)Please always make sure to insert drivers in correct orientation and in the socket correctly
3)The Arduino CNC Shield supports power supplies up to 36V. That does not mean that all Pololu Stepper drivers can run that high. A4988 drivers are not designed to run at 36V and will blow up the first time you power them up at that voltage. The 36V are for drivers like the Pololu DRV8825 that can run on +36V
A4988
DRV8824/DRV8825
TMC2100
Software installation
1) Getting GRBL code on Arduino
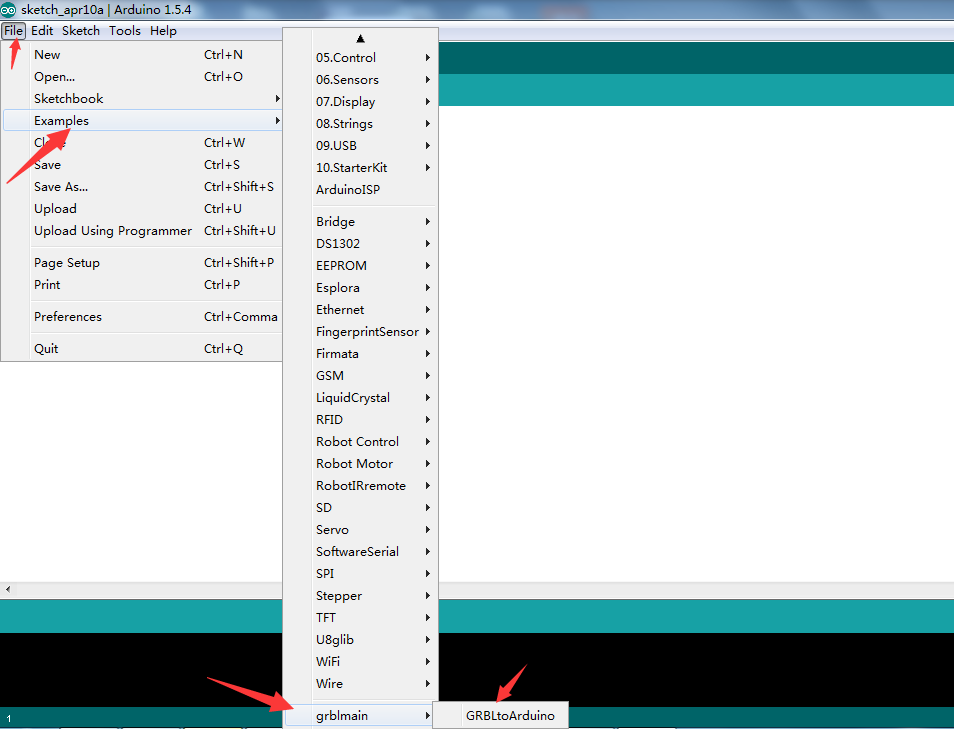
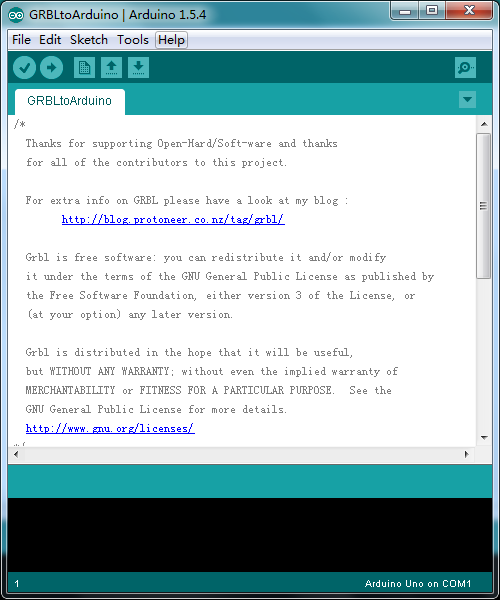
Download the GRBL code from link:grblmain.zip unzip the file and copy to arduino IDE libraries folder, open arduino IDE click File->Examples->grblmain->GRBLtoArduino, choose the correct board and COM, then upload the GRBLtoArduino code to UNO Board

2) Install grbl controller software
Download grbl controller software from link:GrblController.exe , donwload and install,open the grbl controller software as followed
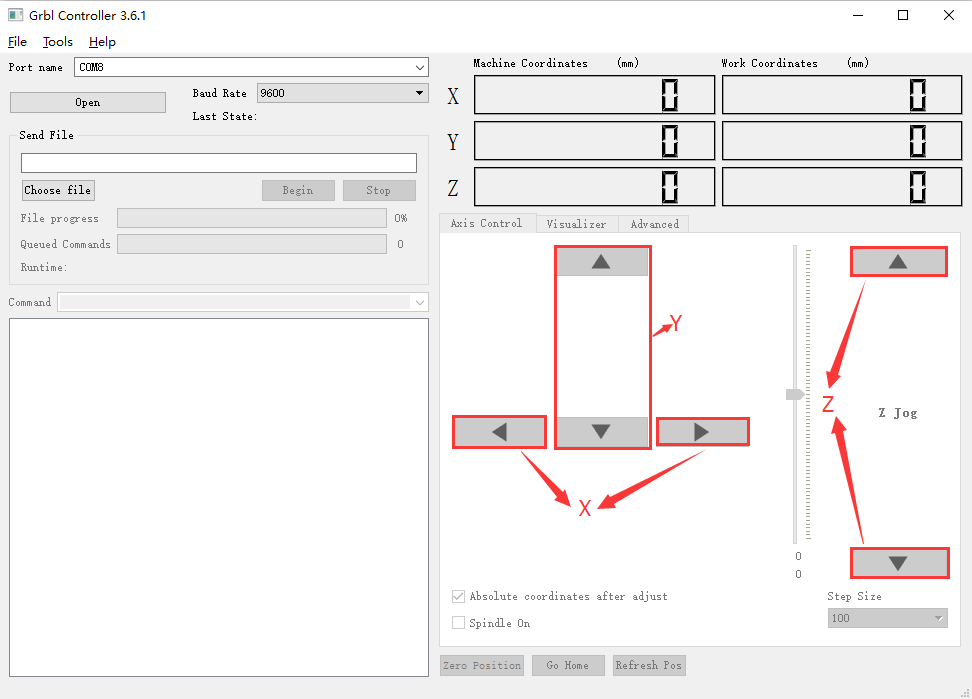
Connect the UNO to PC with USB cable, choose the correct port, set the Baute rate as “9600”, click “Open”, once connected, the button”Open” will change to”Close/Reset” with Red background color. then click “choose file” to choose the file, then click “Begin” to start
engraving

amber administrator
You must be logged in to post a comment
About the Author