MKS 1.4 3D printer board Marlin firmware installation guide
MKS 1.4 is an control board for RepRap Prusa i3 3D compatible printer. This board has integrated Arduino Mega2560 and Ramps1.4 control board and make the circuit installation much simpler than before.
MKS 1.4 has following two sub-version:
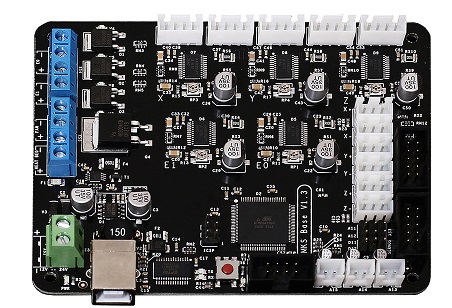
| MKS Base V1.4 | MKS Gen V1.4 |
 |
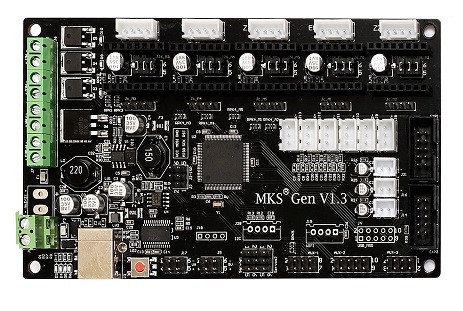 |
MKS Base 1.4 board integrated 5 servo control model which does not included in MKS Gen 1.4 board. All other features of these two boards are same. We can use same Marlin firmware for both boards.
Please take following steps to install the software in order to let your printer work properly.
Prerequisite: You should have connected your Arduino Mega 2560, MKS 1.4 board, LCD control panel and 3D printer properly(if you don’t know how to connect the circuit, check with your supplier or google the related topic).
Please be noted MKS board Z axis servo controller installation as following:
If you have only one Z axis servo, please connect it to Z_MOT slot, if you have two Z axis servos, another servo should be connected to E1_MOT.
For MKS Gen Board:
If you have only one Z axis servo, please connect it to Z slot, if you have two Z axis servos, another servo should be connected to E1.
Caution: do not plug or unplug and wire or module when power is on, do not even touch the board when power is on or your hand has static charge(you can rmove static charge by touching metal tap) . Always double check power wire is properly installed. If you do not follow above move, you can damage the control board and your 3D printer.
Step 1) Install Arduino and driver(Please download the Arduino IDE version 1.5.X, you’d better download 1.5.4 version IDE)
First, please download Arduino IDE from https://www.arduino.cc/en/Main/Software.
Step 2) use USB cable to connect Arduino Mega2560 and your PC. Your pc should detect Arduino Mega2560 and install driver automatically.
If driver can not be installed automatically, you can download the driver from following link:
http://kookye.com/driver/ftdi_ft232_drive.zip
Unzip above file and run the installation program
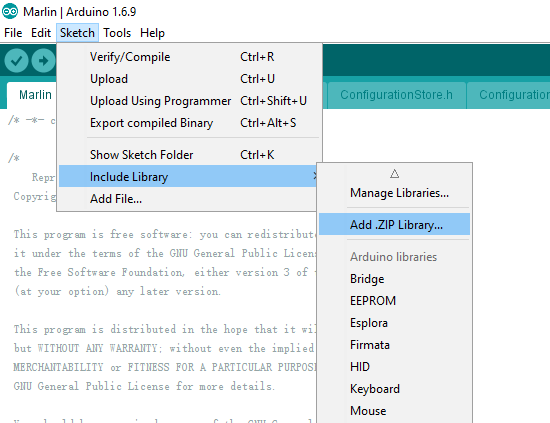
Step 3)Install U8glib library into Arduino IDE. If you have already installed U8glib, please skip this step>
First: Download U8glib library from kookye U8glib library .
Then, in Arduino IDE ->Sketch->Include Library->Add Zip Library , select the zip file you just downloaded and load into IDE. see following picture:
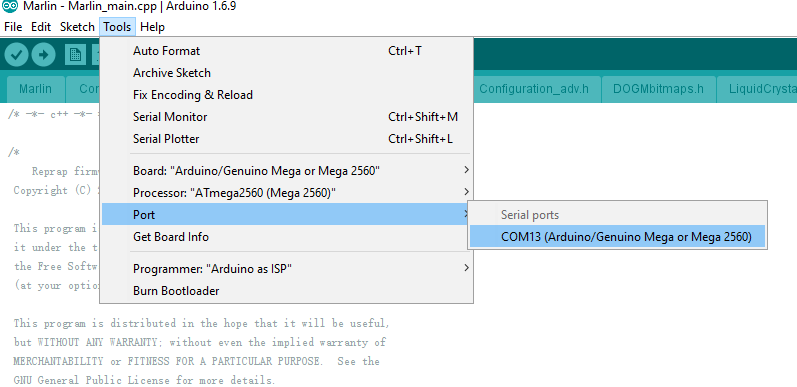
Step 4) In Arduino IDE->Tools->Board select Arduino Mega 2560:
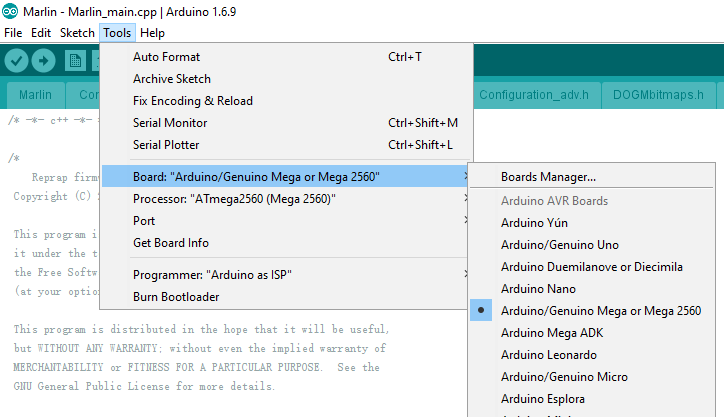
In Tools->Port select the COM port which associated with Arduino Mega2560(see picture below)
Step 5)Download Ramps1.4 board Marlin firmware as per your LCD screen type.
| LCD screen No. | Picture | Download link |
| 2004 | 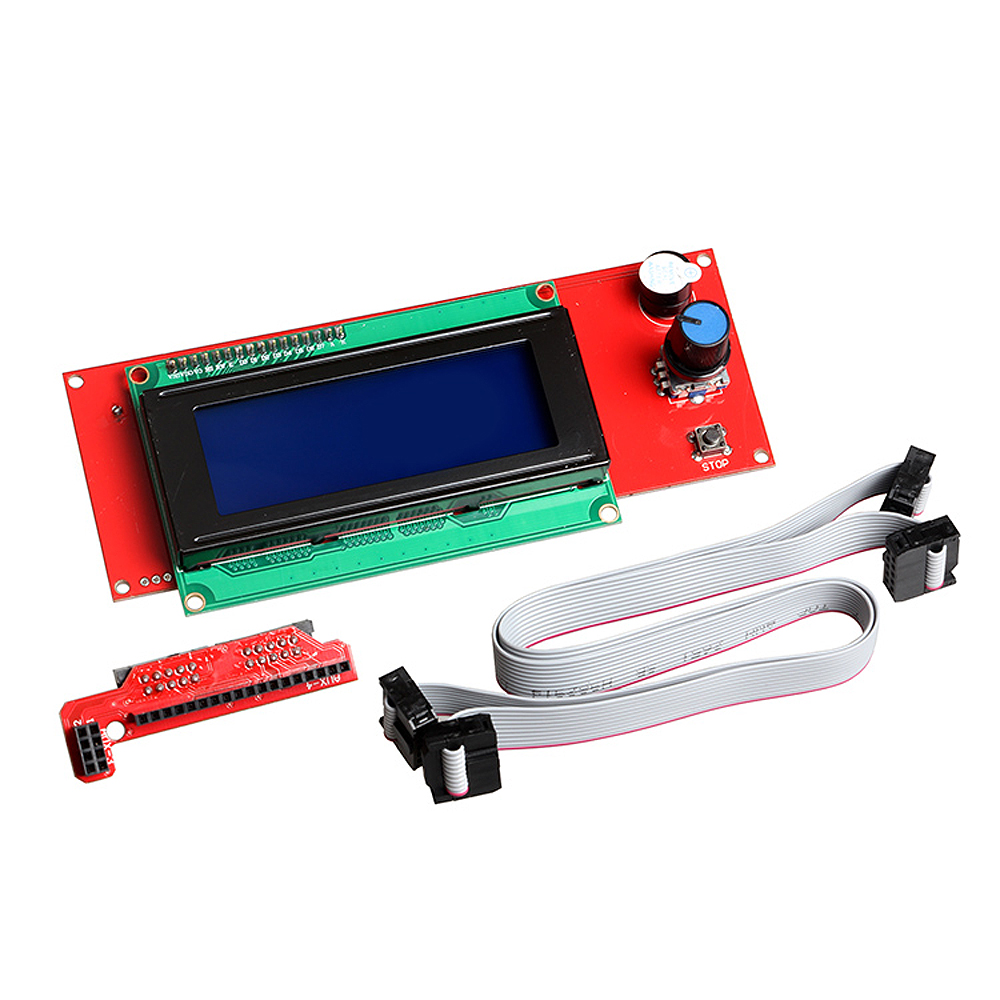 |
2004 LCD Marlin firmware |
| 12864 |  |
12864 LCD Marlin firmware |
Unzip above file, you will see a folder called “Marlin”
In above Marline folder, there is Configuration.h file which defines some important hardware config setting values. Please read following instruction to change the Configuration.h and configuration_adv.h file according to your hardware situation:
A)If you connect MKS Gen/Base board with two Z axis servo motors, please make following changes,
In configuration.h line 248 to 253:
#define INVERT_X_DIR false // for Mendel set to false, for Orca set to true
#define INVERT_Y_DIR true // for Mendel set to true, for Orca set to false
#define INVERT_Z_DIR false // for Mendel set to false, for Orca set to true
#define INVERT_E0_DIR false // for direct drive extruder v9 set to true, for geared extruder set to false
#define INVERT_E1_DIR false // for direct drive extruder v9 set to true, for geared extruder set to false
#define INVERT_E2_DIR false // for direct drive extruder v9 set to true, for geared extruder set to false
in configuration_adv.h uncomment line 148 #define Z_DUAL_STEPPER_DRIVERS as following:
#define Z_DUAL_STEPPER_DRIVERS // disable this line if you have only one Z motor
B)If you connect MKS Gen/Base board with only One Z axis servo motors, please make following changes,
In configuration.h line 248 to 253:
#define INVERT_X_DIR false // for Mendel set to false, for Orca set to true
#define INVERT_Y_DIR true // for Mendel set to true, for Orca set to false
#define INVERT_Z_DIR false // for Mendel set to false, for Orca set to true
#define INVERT_E0_DIR false // for direct drive extruder v9 set to true, for geared extruder set to false
#define INVERT_E1_DIR false // for direct drive extruder v9 set to true, for geared extruder set to false
#define INVERT_E2_DIR false // for direct drive extruder v9 set to true, for geared extruder set to false
in configuration_adv.h disable line 148 #define Z_DUAL_STEPPER_DRIVERS as following:
//#define Z_DUAL_STEPPER_DRIVERS // disable this line if you have only one Z motor
Step 6)In Arduino IDE->File->Open, find Marlin Folder and open Marlin Arduino File(Marlin.ino)
Your IDE will compile the firmware and load it into Mega2560 board. There might be some warning error message during compiling, just neglect those message.
After the firmware is loaded into Arduino Mega2560, your LCD will show 3D printer menu as per following picture:

Now you can now control the printer accordingly.
| Buy from US | Buy from UK | Buy from DE | Buy from IT | Buy from FR | Buy from ES | Buy from JP |
 |
 |
 |
 |
 |
 |
 |
admin administrator
You must be logged in to post a comment
About the Author