Use NodeMCU LUA WIFI module to control LED
In this project , we will use NodeMCU LUA wifi module to turn on/off LED remotely.
NodeMCU LUA wifi module has 3 modes, AP, STA, and AP + STA. In this project, we will work under STA mode. In STA mode, NodeMCU is a client spot in wifi network. You can login to your Wifi Router or hotspot and see IP address of NodeMCU in DHCP client list.
After LUA WIFI mode is connected wifi, we will run a simple webserver and control GPIO devices.
Before running the project, we need download a software tool: ESP8266 LuaLoader .
Download Link 1:LuaLoader.rar
Download Link2:http://www.benlo.com/esp8266/
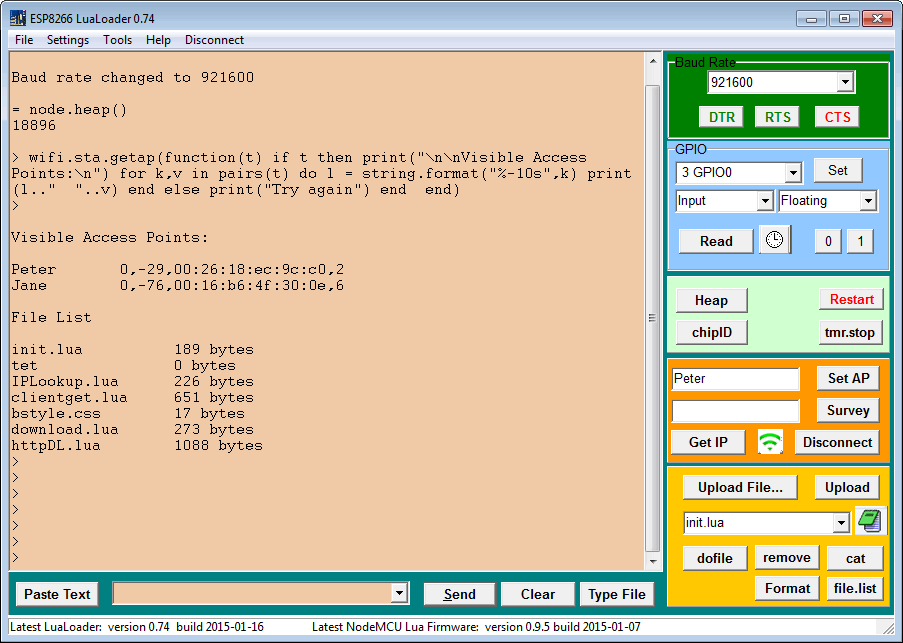
ESP8266 LuaLoad GUI picture:
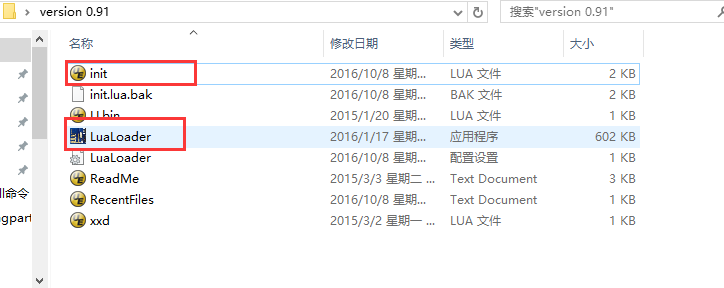
After download, ESP8266 LuaLoader , unzip the software in Windows,Enter into the LuaLoad folder and then enter int Version x.xx folder, you will see a init.lua file
init.lua is an auto running script file when the module starts running. Use text edit to open this file as following:
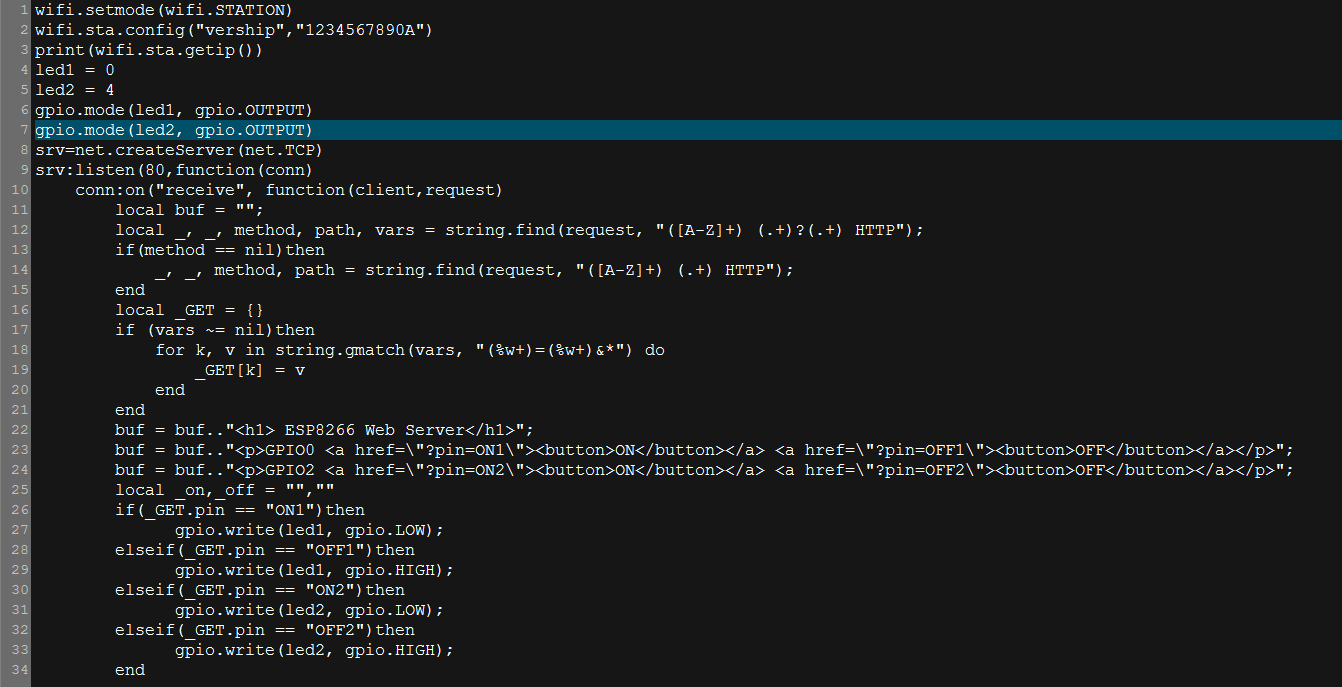

Change the 2nd line wifi hotspot name vership and password 1234567890A to your hotspot name and wifi password.
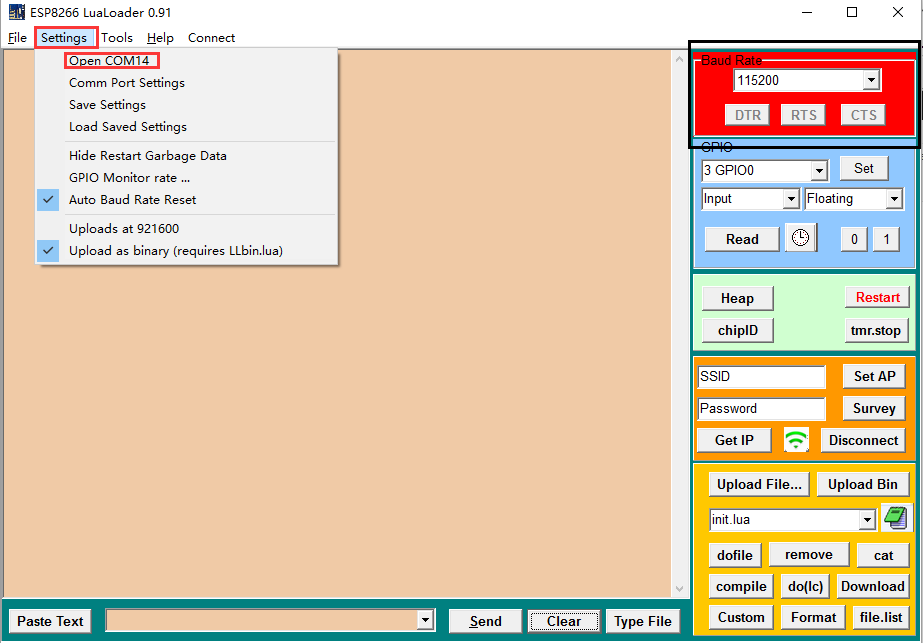
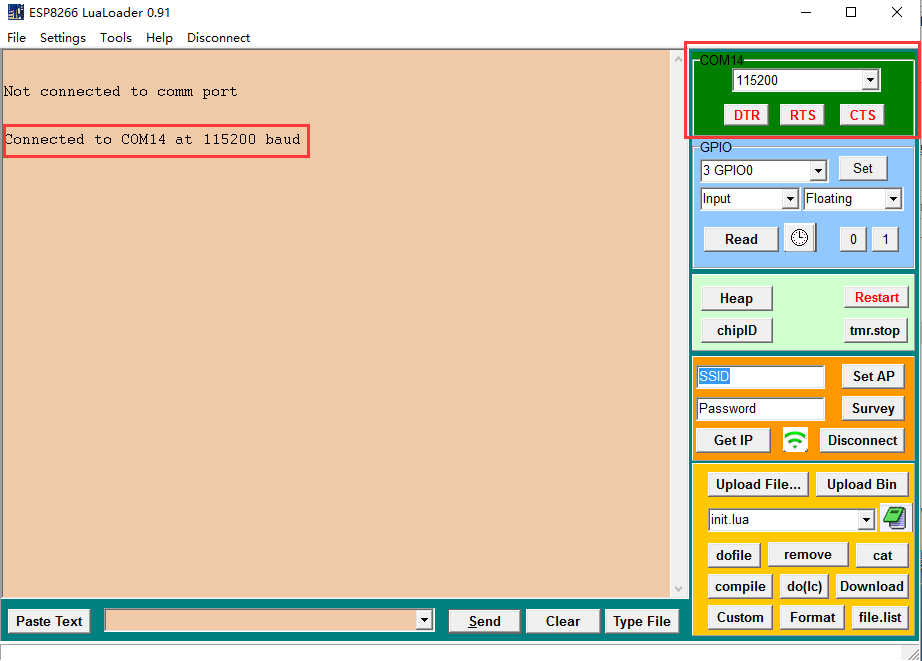
Use a micro usb cable(same cable as many android cell phones) to connect LUA wifi mode to PC. In Windows Device Manager you should see the COM number assigned to the module. Run LuaLoad ,click setting and then open COM xx(same as the COM number you see in Windows Device Manager). When LUA wif module does not connect to PC, the Baud Rate window will be red, after connected, it will turn green.
After connected :
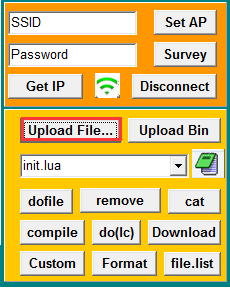
Hold NODEMCU LUA WIF FLASH key,then press RESET key,then release these them at same time. The Wifi Module will enter into firmware loading mode. Click ESP8266 LuaLoader Upload file button as following:
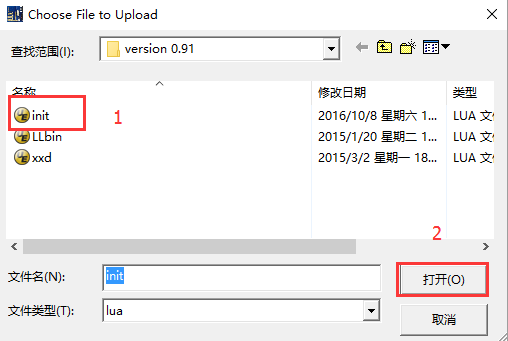
Select init.lua as fireware file to be downloaded as following:
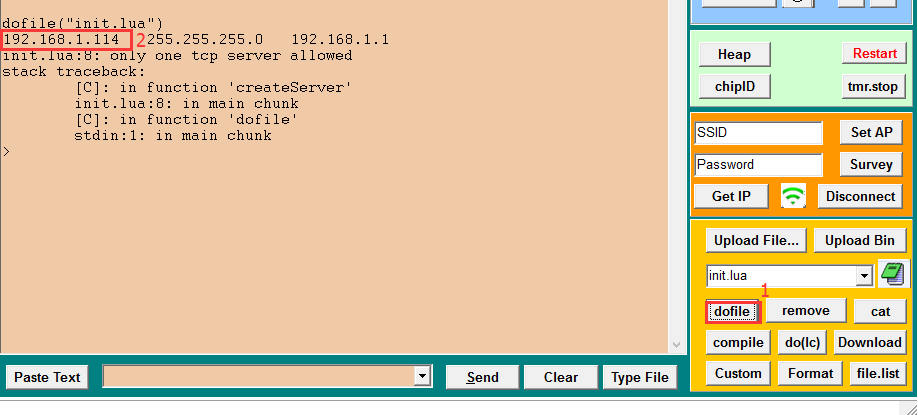
After dofile function executed init.lua code, you will see the IP address assigned to the module as following:
In your broswer, visit above IP address as following:
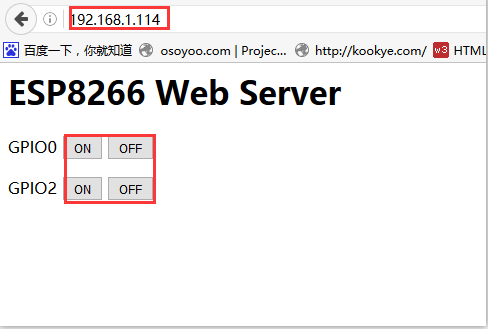
Click On/Off button you can turn on/off LED which connected to GPIO0 and GPIO2.
amber administrator
You must be logged in to post a comment
About the Author