Raspberry Pi Camera Installation Guide
How to install the Raspberry Pi Camera
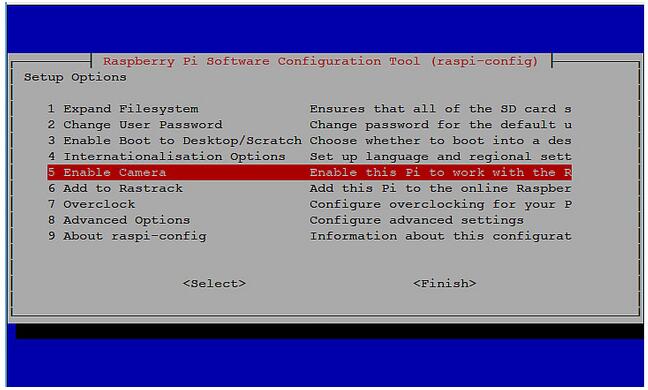
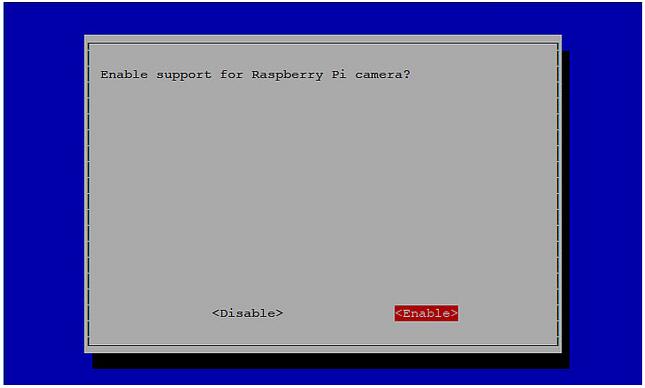
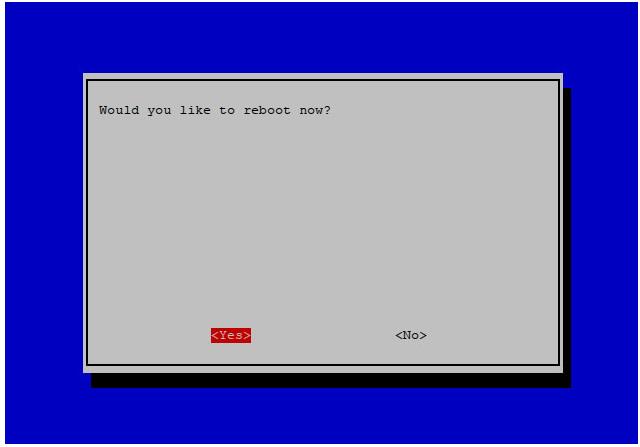
Step 1: Install the Raspberry Pi Camera module by inserting the cable into the Raspberry Pi. The cable slots into the connector situated between the Ethernet and HDMI ports, with the silver connectors facing the HDMI port.
Be aware that the camera can be damaged by static electricity. Before removing the camera from its grey anti-static bag, make sure you have discharged yourself by touching an earthed object(e.g.a)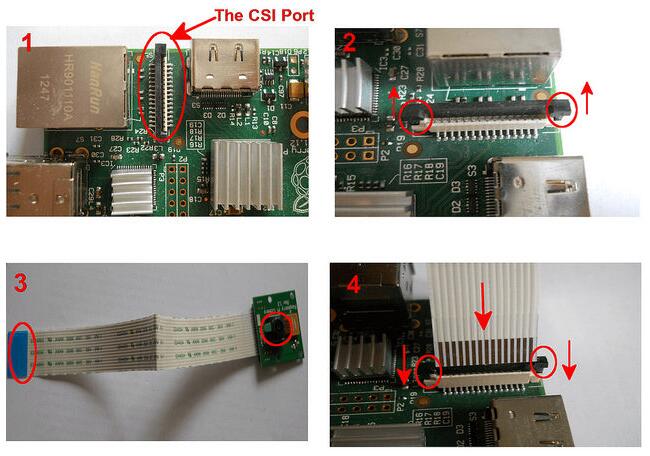
Step 2: Update your Raspberry Pi. Run “sudo apt-get update” and “sudo apt-get upgrade”, then run “sudo raspi-config”


Step 3: You should see the “camera” option, and enable it. Select “Finish” and reboot your raspberry Pi.
HOW TO TAKE A PHOTO WITH YOUR RASPBERRY PI CAMERA MODULE
To capture an image in jpeg format, type “raspistill -o image.jpg” at the prompt, where “image” is the name of your image(“raspistill” is a command line application that allows you to capture images with your camera module. For example, Run”raspistill -o picture 1.jpg -t 2000″
HOW TO RECORD A VIDEO WITH YOUR RASPBERRY PI CAMERA MODULE
To capture a 10 second video with your Raspberry Pi camera module, run “raspivid -o video.h264 -t 10000 -w 1920 -h 1080” at the prompt, where “video” is the name of your video and “10000” is the number of milliseconds, -w and -h is the resolution (“raspivid” is a command line application that allows you to capture video with your camera module. For example, run “raspivid -o mymovie.h264 -t 10000 -w 1280 -h 720”)
amber administrator
You must be logged in to post a comment
About the Author